Quality Check Before Loading: The Photos and Videos You Should Always Ask For
Your villa package will spend two to five weeks inside a sealed steel box at sea, and the only window you get to see the furniture before the container doors close is the one your supplier creates: a folder of photos, a few video clips, a loading report. Most buyers treat that folder as a formality. It is not. It is the lightest version of pre-shipment inspection, the check that happens after production is complete and before the container is stuffed, and done properly it converts “trust me” into an evidence trail you can hand to your installer, your insurer, or your dispute lawyer.
This article gives you the complete request list: 12 photos, 3 video clips, 8 loading records. Every item comes with what to shoot, what it actually proves, and the red-flag version that should make you ask again. The checklist is our own factory practice for villa orders, and every claim that leans on industry data is cited in the sources note at the end.

What “pre-shipment” really covers
There are three checkpoints on the factory calendar, and buyers routinely confuse them.
The first is mid-production. Industry practice is to run a during-production check, often called DUPRO, when roughly 30 percent of the order is assembled, while major assembly errors are still reversible without scrapping material (riwick, 2024-04-26). The second is the final pre-shipment inspection, or PSI, which runs after 100 percent of the order is complete and packed, but before the container closes. The third is the loading itself, where the question stops being “is the furniture good” and becomes “will it arrive good.”
Two of these happen at the factory. The one that most protects a villa buyer is the second, and this is the one this article is about.
It is worth separating the PSI from a warehouse receiving check, because freight-forwarder warehouses often do the latter and buyers mistake it for the former. A receiving check can count cartons, look at exterior packaging, weigh and measure, and read shipping marks. It is not a quality inspection. A dedicated furniture QC pass adds measurements, material verification, color comparison, surface inspection, assembly testing, stability checks, hardware inspection and functional testing (JWLogistics, updated 2026-08-26). If your “inspection” was a warehouse clerk photographing the outside of the boxes, you were never inspected at all.
The numbers on why this checkpoint matters are blunt. One sourcing agent’s compiled data puts the share of first-time factory loads that require rework before shipment acceptance at about 38 percent, and the share of first-time factory audits that uncover at least one critical non-conformity at 42 percent (riwick, 2024-04-26, industry-side compilation). A full three-stage inspection protocol adds roughly 3 to 4 percent to an order’s cost and consistently eliminates 80 to 90 percent of post-delivery repair costs (ibid.). You will not always pay for the full protocol. You should always get the evidence it is built from, which is what the photo and video sets below are.
At our factory, pre-shipment checking is step three of our five-step process: quantity, appearance, size, finish, labels and packing are checked against the confirmed order, finished-product photos are shared for selected custom items, and labels and packing marks are reviewed before loading to make receiving and installation easier later (How It Works). On the calendar, this checkpoint sits in the last few days before the vessel, which is where it lands in our sea freight timeline (Sea Freight to Your Country).
The photo set: 12 shots that prove a lot
Photos are the cheapest evidence that exists, and the rule is simple: every high-risk surface, every fragile item and every room label must appear in at least one photo. If an item never appears, it never gets inspected, which is the same thing. The set below is our standard pack for villa orders. Ask for all twelve as a single folder, named by room.
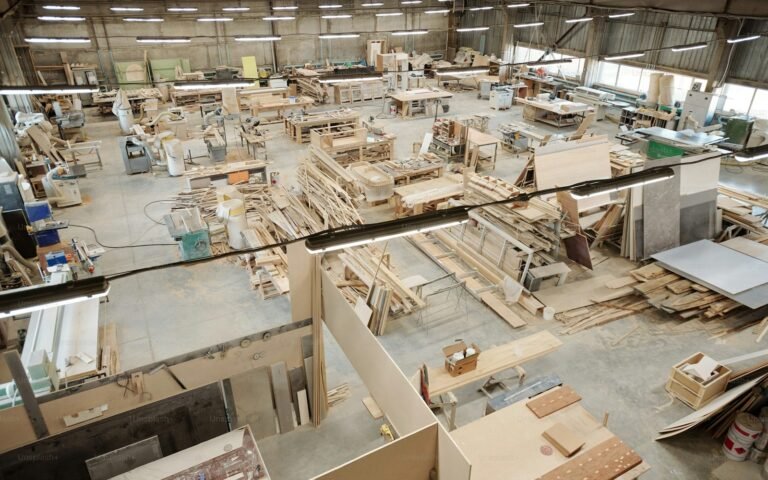
1. The full staging area. One wide frame showing the entire finished set, or each room group, with the room labels visible. This is the photo that proves completeness against your packing list, and it is the photo that exposes a staged room. Red flag: only single items, no wide shot.
2. The carton marks. A close-up of the printed mark on each crate or carton: PO number, room, product name, carton X of Y. This is what your installer will use on the dock, so a blurred or missing mark is a defect, not a detail. Our numbering system is designed exactly for this handover (numbered villa interiors factory tour).
3. The room-by-room count. Rows of labeled cartons per room, so the count is visible and auditable. “14 of 14” should be something you can see, not something you are told.
4. Face panels, square-on, in even light. Every door front, drawer front and worktop, shot perpendicular to the surface. This is where scratches, dents and finish failures show. Red flag: everything at the same 3/4 angle from the same corner. A unit always has one good side. You want both.
5. Corners and edges. The four corners of every high-gloss, lacquer, stone or metal piece. Corners are the first point of contact in any handling sequence, and they are where transit damage is born. High-gloss surfaces, stone, glass and stainless steel are the surface-sensitive items that get damaged in pickup, loading and consolidation (JWLogistics, 2026-08-26).
6. Edge banding, side-on. Look down the panel edge, not at the panel face. Edge banding that is loose, chipped or peeling will fail in the first weeks of use, and the reason is usually an adhesive substitution that is invisible from the front. In one documented inspection case, a factory had substituted a low-temperature PUR hotmelt for the specified EVA adhesive; a thermal check caught it on 22 panels that would have peeled within weeks (riwick, 2024-04-26).
7. Door gaps, measured. A tape measure or feeler gauge at the top and bottom of each door, and at both sides. What you are checking is uniformity: the gap should match on both sides and top to bottom, and both doors of a pair should sit level. A gap that narrows toward the bottom is a door that will stick within a year.
8. Drawers fully extended. Every drawer out to full travel, one photo per run. This proves the rail is installed, the drawer clears the carcass at full extension, and nothing binds. A drawer that stops halfway is caught here, free of charge, before it is packed.
9. Hinges and slides, close-up. The installed hardware, close enough to read what it is. Your spec sheet should name the hardware or an equivalent; a photo where the hardware is not identifiable is a question you are being asked to skip. This is the same logic as the sample-stage hardware check: install it, run it, confirm it operates as intended (forwarderone, undated).
10. The hardware bags. The numbered small-parts bags, taped or strapped to the correct carton. Furniture ships disassembled and the small components, screws, hinges, brackets, legs, handles, rails, are exactly what gets lost when packing is inconsistent (JWLogistics, 2026-08-26). Our room-by-room packing practice exists to kill this failure mode.
11. Stone and glass, with protection in place. Every slab, mirror and glass panel with its corner guards, foam and crate visible, oriented as it will ship. Protection that is described in the packing list but not visible in the photo does not exist.
12. ISPM-15 mark and moisture reading, where applicable. Any raw-wood crate, pallet or dunnage must carry the treatment mark where the destination requires it. And for solid-wood or engineered-wood orders, ask for the moisture meter reading on the panels: one inspection case logged two particleboard sheets at 13.6 and 14.1 percent, pulled from the bottom of a pallet stored on a damp floor, against a 12 percent threshold under GB/T 17657; the factory swapped them before cutting (riwick, 2024-04-26). Wood moisture is what prevents warping and cracking across an ocean crossing (forwarderone, undated).
The video set: 3 clips worth asking for
A still photo is a chosen moment. A function is a sequence, and a sequence cannot be staged the way a still can. That is the entire argument for asking for three specific clips.
Clip 1: Every drawer, full cycle. Open and close each drawer at least three times, at walking pace, with the soft-close damping visible. This proves the rails are seated, the damping mechanism is actually fitted, and the drawer front tracks straight. A photo of a closed drawer proves almost nothing.
Clip 2: Door gaps and swing. Walk around the unit. Open each door to 90 degrees, hold it, let it close, and pan across the gap line. This catches alignment that only shows under the door’s own weight: a door that looks square in a photo can sag against the carcass the moment you open it.
Clip 3: The stability walk-through. A light push on the corner of each desk, cabinet or tall unit, then a slow camera sweep of the entire staged room, start to finish. Wobble at this stage is an assembly problem, and assembly problems are the cheapest thing in the world to fix before the container closes. In the same riwick case file, misaligned leg brackets on eight modular desks were caught at an in-line stage and corrected overnight, before they became $2,400 of on-site repair.
One honest note on video, straight from the industry’s own warning: a supplier’s self-report is, by definition, a marketing document, and a remote video gives the same curated view, because “the buyer sees only what the supplier wants them to see” (riwick, 2024-04-26). The mitigation is procedural, not suspicious: the batch set aside for rework before the camera starts rolling is invisible in any clip. That is why the wide shots, the counts and the loading photos matter as much as the beauty shots.
Our practice for villa orders is better than any edited clip: a live video call where you point the camera yourself, room by room, while our QC line executes. We still archive the call, because a file you can replay is worth more than a memory of a good call (factory practice, stated as practice, not standard).
The loading photos: eight records for the second half
Furniture that left the factory in perfect condition can still arrive broken, because the container is where the damage actually happens. The eight records below cover the four areas that loading-inspection checklists converge on: the container, the cargo, the securing, and the documentation (mbmlog, undated).

1. The empty container. Floor boards, walls, roof, door seals, inside the box before a single crate moves. The practical test is the light test: if daylight shows through the roof or walls, water will get in too. The container should be clean, dry and odor-free before it touches your furniture.
2. The CSC plate. The safety approval plate, readable in the photo. An expired plate means the container should not travel internationally, and some terminals will reject it outright. Catching it at the warehouse costs nothing; catching it at the port costs days (mbmlog, undated).
3. The first row, labels visible. The first loaded row or stack with the room labels facing the camera. Loading order is unpacking order: our crates go in in reverse installation sequence so your site team can unload room by room without hunting (Why We Pack by Room). If the first photo shows random stacking, the last six weeks of your installation schedule just got harder.
4. Heavy low, fragile high. Stone, heavy cabinets and dense items on the bottom; sofas, light cabinets and fragile cartons above. This is the core principle of the IMO/ILO/UNECE CTU Code as it applies to furniture, and heavy-on-light stacking is the single most common cause of transit crush damage (JWLogistics, 2026-08-26).
5. Bracing in place. Blocking and bracing timber fixed to the container, with the load path going into the corner posts and side rails, not just the floor boards. The corner posts and side rails are the strongest structural members of the box; bracing that relies only on floor nails can tear loose under the repeated forces of a sea crossing (mbmlog, undated).
6. The shake test. After bracing, the loader pushes the cargo hard. If anything moves, more securing goes in, and you want the photo of the final state. This is the moment that separates a container that arrives as it left from one that arrives rearranged.
7. The seal number. A close-up of the seal with its number, readable, after the doors close. The seal number is the anchor of the entire claim chain: it connects your factory photos, the loading record and the arrival photos. If a crate is broken at your site, the seal is what proves the state at departure.
8. The full-container view, plus a baseline. One frame looking down the finished container, and, where offered, a humidity and temperature baseline recorded before closing. The baseline is a small piece of paper that becomes a reference point if condensation damage is ever claimed on a four-week voyage (mbmlog, undated).
After loading, request the measured final numbers, not the estimates: carton count, gross weight, dimensions and CBM, taken after any reinforcement, crating or repacking. Factory estimates change during packing, and your freight and customs documents should carry the measured values, which then feed the rest of the logistics file covered in our shipping guide (JWLogistics, 2026-08-26).
How to read what you receive: six staging traps
The photo folder you receive is a document produced by the other side of a commercial relationship, and the buyer’s job is to read it the way an auditor reads a ledger. None of the six traps below require you to accuse anyone of fraud. Honest factories make these omissions too; the point is that you should never have to notice them.
Trap 1: The one-good-side angle. Every face panel has a side that photographs well and a side that does not, because the scratch, the dent and the edge chipping almost never sit in the center. If all twelve of your photos are taken from the same corner of the room, you have been shown one side of every unit. The fix is procedural: ask for both sides of face panels, and for the wide shot to be taken from the opposite corner from the detail shots.
Trap 2: The light trick. Backlight washes out a finish and makes a lacquer surface read as flawless. Flash bounces off high-gloss and can hide fine scratches entirely. What you actually want is flat, even light, and if the factory floor is bright, the detail shots should be taken out of the direct sun. Red flag: a set where every surface is either slightly overexposed or slightly shadowed.
Trap 3: The hero unit. The perfect unit, staged at the front of the room, photographed from four angles, while the other 49 units sit in the back. This is the trap the wide shot exists to catch: a beautiful set of close-ups with no staging photo is the classic shape of a hero unit. If photo 1 of your twelve is missing, you do not know which 49 units the close-ups belong to.
Trap 4: The missing count. A supplier who sends gorgeous unit photos but skips the staging area, the carton marks and the room counts has shown you quality and hidden quantity. Both are part of the inspection. A short count is a shipping problem, a customs problem and an installation problem all at once, and it is the one problem the beauty shots were never going to reveal.
Trap 5: The staged room. Props, decorative lighting, a vase on the worktop, a room set up to be photographed. The question a QC photo must answer is not “is this beautiful.” It is “is this my furniture, in my packing, at this moment.” Staging turns the answer into “no, it is a lookalike.”
Trap 6: The compressed file. WhatsApp and WeChat re-encode images aggressively, and a fine scratch on a lacquer door can disappear in the compression. Ask for originals, and keep the timestamps, because the date on the file is part of the evidence that the photo was taken at the claimed moment, not recycled from a previous order.
How we review the pack, as factory practice: every photo is checked against a packing-list line the same day, missing angles are logged and re-photographed within 24 hours, and the balance is released only after the full pack, photos and clips, is complete and accepted. If your contract already ties the balance payment to a pre-shipment acceptance, this is what that clause is actually operationalizing (Contract With a Chinese Supplier: 5 Questions First).
When photos are not enough
The honest limit of the photo pack is that it proves what is visible. Three of the most expensive furniture defects are invisible in a photograph.
Moisture content is the first. A panel that looks perfect in a photo can be 14 percent moisture and will warp in transit or in your home. The photo only helps if it shows the meter’s reading, and the reading is only real if someone measured at that moment. The second is steel gauge and material substitution: 1.2 millimeter steel where 1.5 was specified is a 20 percent reduction in structural capacity, and it photographs identically (riwick, 2024-04-26). The third is adhesive substitution and skipped load testing: a five-round static load test takes roughly 25 minutes per unit, which is exactly why factories skip it, and that same source’s warning is direct: a remote check built only from photos, video and self-declared test reports will never catch a substituted adhesive or a skipped load test (riwick, 2024-04-26).
This is where independent inspection earns its fee. A final random inspection follows AQL sampling, with AQL 2.5 allowing zero major defects in the inspected sample; for a 50-unit order the standard sample is 8 units (riwick, 2024-04-26). Industry guidance recommends inspecting roughly 10 percent of the finished run as a workable sample size for furniture (forwarderone, undated, citing looperbuy). The cost shape: third-party man-days are quoted in the $180 to $300 range in current industry posts (undated), piece-by-piece inspection runs from about $240 per man-day in China (tetrainspection, 2022-06-21), and the full three-stage protocol lands at 3 to 4 percent of order value (riwick, 2024-04-26). The same riwick case file shows the return side: $2,800 of inspection against $8,400 of avoided rework, replacement and freight, an outcome that industry-side sourcing agents compile and publish as a reference, not as a guarantee.
Our practice for villa orders, stated as practice: for a single villa, one or two containers, the supplier photo pack plus a live video call plus a balance payment conditioned on acceptance is the standard, and it is what most of our clients use. We would recommend adding an independent inspector for multi-unit developments, for a supplier with a prior QC miss, or wherever your contract already ties the balance to a third-party report. The deeper walkthrough of what an inspector actually checks on the factory floor is our container-seal inspection guide (How to Inspect Villa Furniture Before the Container Seals).
Frequently asked questions
When should I ask for the QC photos?
At the final pre-shipment checkpoint, after 100 percent of the order is complete and packed, ideally three to five days before the container closes, so there is time to rework and re-photograph anything that fails. If the order is large enough to justify it, ask for a mid-production check around 30 percent assembly first, because major errors are still reversible at that stage (riwick, 2024-04-26).
How many photos are enough?
There is no universal count. Our standard pack is 12 photos plus 3 video clips plus 8 loading records, and the real test is coverage: every room label, every fragile item and every high-risk surface appears at least once. Photo documentation exists to create a paper trail if a damage claim arises later (forwarderone, undated). If a single photo answers “which units are these, how many, and in what state,” the set is doing its job.
Do I need a third-party inspector for a single villa?
Usually not. A third-party man-day costs from roughly $180 to $300, piece-by-piece inspection runs from about $240 per man-day in China (tetrainspection, 2022-06-21), and the full three-stage protocol adds 3 to 4 percent to the order (riwick, 2024-04-26). For a one-or-two-container project, the supplier photo pack, a live video call, and a balance payment conditioned on pre-shipment acceptance cover the same risk at a fraction of the cost. Escalate to an independent inspector for multi-unit projects or repeat QC misses.
What if the photos show a problem after I have paid the balance?
That is precisely why the balance should be tied to pre-shipment acceptance rather than to the bill of lading. The working clause: the supplier reworks the failed items and re-photographs them before loading, and the balance releases on your written acceptance of the corrected pack. A defect fixed before the container closes costs a day of factory labor; the same defect found at your site costs a container opening, a dispute and a claim.
The photos looked perfect. Why can the furniture still arrive damaged?
Because factory photos prove condition at the factory, not in transit. The chain of evidence has to continue past the loading dock: loading photos, seal number, and arrival photos at your site, in that order. If a claim is ever needed, your cargo insurance policy, which is typically priced as a small percentage of the CIF value depending on the term you chose, is what pays, and it pays against that chain (Incoterms Explained for Homeowners).
Can a live video call replace the photos?
For functions, yes, and it is better: you direct the camera, the supplier cannot edit. But a call is not a file, so record it, and still take the photo pack, because the photos are the document your installer, insurer and customs broker will actually read months later.