
How to Inspect Villa Furniture Before the Container Seals
The inspection that protects you is the one that happens after your villa’s crates are staged and before the container seals: the pre-shipment inspection. It is a final, independent check of the packed set against the bill of materials — quantity, finish, dimensions, hardware and packaging — done at the warehouse where the defects are still fixable and the evidence is still on site. You can run it yourself remotely with a photo and video protocol, or you can pay a third-party furniture inspection service to stand in the warehouse and open the crates. Either way, the goal is the same: catch every problem while it is a rework instruction, not a claim against a ship that left weeks ago.
This guide covers what the five inspection blocks are, how to direct a remote inspection that actually works, when a third-party inspection service is worth its fee, the defects that photos miss, and what to do when the report comes back with failures. It builds on the nine production stages and the BOM reading guide — inspection is the last document in that chain.
In This Guide
- The Inspection You Actually Need: The Pre-Container Gate
- The Five Blocks Every Inspection Covers
- Remote Inspection: The Photo and Video Protocol
- When a Furniture Inspection Service Is Worth the Fee
- The Defects Photos Miss and a Physical Check Catches
- What to Do When the Inspection Fails
- What Inspection Is Not
- Frequently Asked Questions
The inspection you actually need: the pre-container gate
A villa run gets checked several times before it ships, and the checks are not the same. The numbered quality control at the end of production checks each part as it leaves the line; the staging audit checks that the crates match the packing list. Both are the supplier checking itself, and both are valuable — but they are performed by the party with the most to lose from a late finding. The pre-shipment inspection is different: it happens on the finished, packed set, after staging is complete, and it is directed by the buyer’s document, the BOM, not by the factory’s schedule.
That timing is the whole point. Once the container seals, you are separated from your furniture by distance, a carrier, a port and customs — and the cost of finding a problem climbs at every one of those boundaries. The shipping guide covers what happens after the seal; inspection is the last meaningful decision you make before it.
The five blocks every inspection covers
| Block | What to check | How it is verified | What a failure looks like |
|---|---|---|---|
| 1. Quantity | Every part counted against the BOM, crate by crate | Count + photograph part numbers | Missing panels, short hardware sets |
| 2. Finish & colour | Surface and colour against approved samples | Side-by-side under neutral light | Batch variation, dust, runs, mismatched doors |
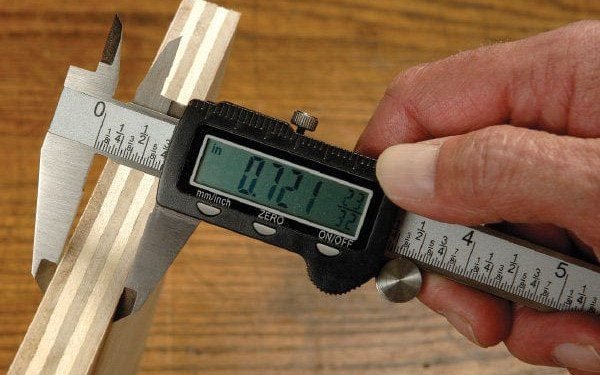
| 3. Dimensions & fit | Key dimensions and squareness of primary parts | Caliper and tape on sampled parts | Drift, out-of-square cases, mismatched joinery |
| 4. Hardware & function | Hinges, runners, doors open and close | Physical cycling, hardware bag vs list | Wrong models, missing screws, stiff runners |
| 5. Packaging & labels | Crate condition, protection, labels vs packing list | Visual pass + label check | Damaged corners, mislabeled crates, loose packs |
Block 1 and block 5 are the fast ones: counting and label-walking take an hour in a well-run warehouse and they catch the failures that cause the worst install days — a missing panel discovered on site is a week of delay, a missing panel discovered in the crate list is an afternoon of rework. Blocks 2 to 4 are where the villa’s actual quality is confirmed, and they are where a remote inspection and a physical one genuinely differ.
Remote inspection: the photo and video protocol

Most villa buyers never fly to the warehouse, so the remote inspection is the default — and it works when it is directed like a work order, not a video call. The protocol that catches the most problems:
- Crate walk first. One continuous video of every crate in order, labels readable, before anything opens. This is your quantity and label record.
- Open one crate per room fully, on video, with the part numbers in frame. Count against the BOM while it happens.
- Finish checks under neutral light, at arm’s length and close: every door of the same finish photographed together so batch variation is visible in one image.
- Cycle the hardware. Every door opened and closed, every runner pushed out and back, on video. A runner that drags on the bench is the same runner that drags in your villa.
- Dimensional spot-checks with the caliper in frame, the reading legible, against the BOM values you provide.
What the protocol cannot catch is the tactile: the feel of a hinge closing, the smell of the finish, the way light moves across a sprayed surface at an angle. Those are the gaps that justify the third option, and they are also why a supplier that refuses the protocol at all is answering the question before you ask it.
When a furniture inspection service is worth the fee
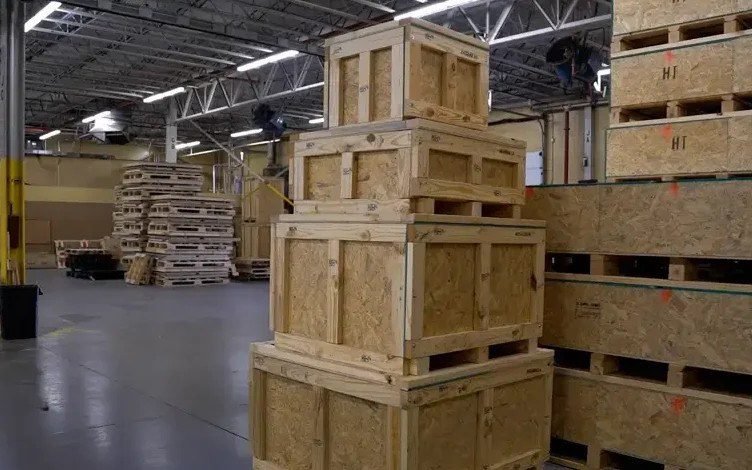
A third-party furniture inspection service sends an independent inspector to the warehouse for the pre-shipment check: they open the crates you name, cycle the doors, pull-test the edges, measure the sampled dimensions against your BOM, shake-test the packing, and file a written report with time-stamped photos. They report to you, not to the factory, and their fee does not change with the number of findings — which is the structural reason the check is honest.
The fee scales with the size of the run — the number of crates, the number of parts opened and cycled — so a full villa container costs meaningfully more than a single-room LCL add-on, and quotes are part-size specific rather than flat. The decision rule that works in practice: for a full package with lacquered or painted finishes, the service is worth it, because finish defects are exactly the ones photos understate. For a small LCL order of HPL parts, a well-run photo protocol usually covers it.
The defects photos miss and a physical check catches
| Defect | Why photos miss it | The physical test that catches it |
|---|---|---|
| Edge delamination | Edge looks clean at camera angle | Pull-test the edge at the corner under load |
| Finish batch variation | Same screen, same lighting flattens it | All same-finish doors side by side, raking light |
| Hardware model substitution | Close-up looks identical | Check model marking against the BOM line |
| Hole position drift | Invisible until parts are mated | Mate a test pair and close the joint |
| Fine dust in finish | Caught only at oblique light | Rake the surface, photograph at 45° |
| Internal crate damage | Box looks fine from outside | Shake-test, then open the inner packing |
| Missing small parts | Dowels and corner protectors vanish in photos | Count the hardware bag piece by piece |
| Mismatched crate label | Label photographed out of context | Walk the label sequence against the packing list |
Notice what unites the list: every one of these is a defect that a good photo can show, if someone thought to take that specific shot. The inspection is not so much about eyes as about a checklist that forces the right eye at the right angle.
What to do when the inspection fails
A failure on the report is a work order, not a verdict. The decision runs through three branches. Cosmetic and local — a dust mark on one door, a scuffed corner protectable in transit — can be accepted in writing with a note, or reworked in hours; both are cheap. Functional or dimensional — a door that will not close, a case out of square, a wrong hardware model — must be reworked and re-inspected before the seal; shipping it converts your problem into your installer’s. Systemic — a finish batch that is off across a room, a BOM quantity that is short by a set — goes back to the drawing of the problem: re-nest, re-cut from the same material batch, re-inspect, and confirm the schedule impact in writing before the vessel date.
The one rule that overrides the schedule pressure: never sign the release to ship with open critical findings, however late the container is. A delayed villa arrives whole; an early villa arrives with a list of problems attached to a bill of lading, and the cost of fixing those at the destination — labour, local materials, a second shipping window — is where the expensive surprises live. The Fiji island case is the argument in full: the entire reason that install went smoothly over 8,000 km is that nothing arrived with an open finding.
What inspection is not
Inspection is the last gate, and it is easy to mistake it for the other documents in the chain. It is not the BOM: the BOM is signed before production, and it defines what “correct” means — inspection measures against it, it never redefines it. It is not the stage-7 numbered quality control from the production run: that is the factory checking parts as they are made, while inspection is the buyer’s check of the packed set. And it is not loading supervision: loading happens after the seal decision, and a well-packed villa loaded late is still a well-packed villa, but a badly inspected one loaded on time is a problem you pay for twice. Each layer exists to catch what the layer before it cannot see, and the order of the chain is the point: BOM first, production checkpoints second, inspection last — in that order, and never out of it.
Frequently asked questions
Do I need an inspection for every villa?
For a full villa package, yes — the run is large enough that one missing set or one off-batch room costs more than any inspection. For a small LCL add-on of already-approved HPL parts, a disciplined photo protocol against the BOM is usually proportionate; the decision scales with value and finish complexity.
Can I run the whole inspection myself with photos?
You can run most of it: the crate walk, the counts, the finish comparisons, the dimension spot-checks and the hardware cycling all work on a directed video call. What does not travel well over a camera is the tactile — edge pull, runner feel, raking-light finish — which is the part a physical inspector adds.
How much does a furniture inspection service cost?
The fee scales with the size of the run: how many crates are walked, how many parts are opened, cycled and measured. A full container of villa joinery costs more than a single-room LCL order, and quotes are part-size specific rather than flat — ask for a quote against your BOM and packing list, which is also the best way to test whether the inspector will actually work from your documents.
How long does the pre-shipment inspection take?
From half a day for a small order to a full day or more for a complete villa container, depending on how many crates are opened and how many doors cycled. It is booked after staging is complete and before the container is sealed, so it slots into the last days of the run, not into the sea freight.
What happens to the parts that fail the check?
They are logged against their BOM numbers and reworked: re-finished, re-cut from the same material batch, or re-sourced from the same hardware model, then re-inspected before the seal. The re-inspection is part of the report, not a favour — the final page should show the findings closed.
Does the supplier see the report before I do?
You receive the report, and professionally the findings are shared with the supplier so they can rework — the goal is a villa that ships, not a scorecard. What you control is the sequence: nothing is released for loading until you have seen the closed findings, which is exactly the order that keeps the check honest.
Send us your BOM and we will map your inspection: the five blocks, the protocol, and who should stand in the warehouse.



One Comment