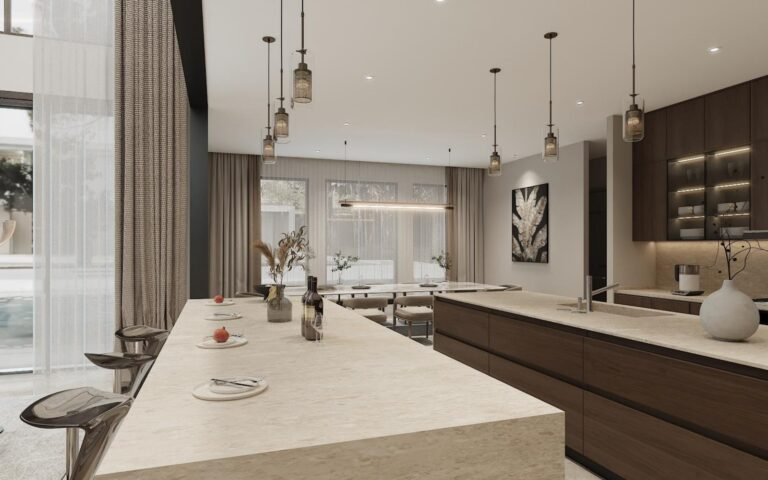
Lighting Plans for Villas: Layered Lighting Buyers Often Underestimate
Lighting is the cheapest thing in a villa to get right at the drawing stage and the most expensive thing to fix afterwards, because by the time the joinery is installed the walls are closed and the ceilings are painted. It is also the part of a fit-out that buyers most often delegate with a sentence: make it bright.
That sentence is how villas end up with a single layer of ceiling downlights, three different shades of white in the same room, and cabinets that look flat at night. What follows is the plan we walk through with clients, in the order the decisions actually get made: the layers, the colour temperature, the cabinetry, the tall spaces, and the electrical drawing that ties them together.
The three layers, and why one is not a plan
Professional lighting plans are built in layers, and the framework is standard across the industry: ambient light for general illumination, task light for the work surfaces, accent light to add depth, and decorative fixtures for character (Toney Kitchens, 2025-10-25).
| Layer | What it does | Typical villa examples |
|---|---|---|
| Ambient | General illumination of the room | Recessed ceiling lights, ceiling panels |
| Task | Concentrated light where work happens | Under-cabinet strips, island pendants, hood lighting |
| Accent | Depth, drama, hierarchy | In-cabinet strips, toe-kick glow, shelf lighting |
| Decorative | Character and scale | Pendant clusters in stairs, feature chandeliers over dining |
Most under-planned villa interiors have only the first layer. The result is a room that is evenly lit and completely flat: no shadow, no highlight on the stone, no reason for the eye to move. The second failure is the opposite one, and it has a name in the trade. Over-lighting a kitchen until it reads like an airport runway is a documented and common mistake, and the fix is fewer fixtures plus proper layering, not more wattage (Toney Kitchens, 2025-10-25).
The practical test we give clients is a simple one. Stand in the finished room at night and ask three questions: can I work here, does anything look beautiful here, and can I dim it. If the answer to any of them is no, a layer is missing.
Villas make this harder than apartments, for two reasons that are structural, not cosmetic. The first is volume: a villa has more rooms with more distinct functions, so a single lighting strategy has to serve a kitchen, a dining room, a study and a stairwell that are all visible from one another. The second is ceiling height, which changes the geometry of every fixture decision, because a downlight aimed for a 2.7 m ceiling produces a completely different pool of light at 6 m.
Colour temperature: the number that decides how everything looks
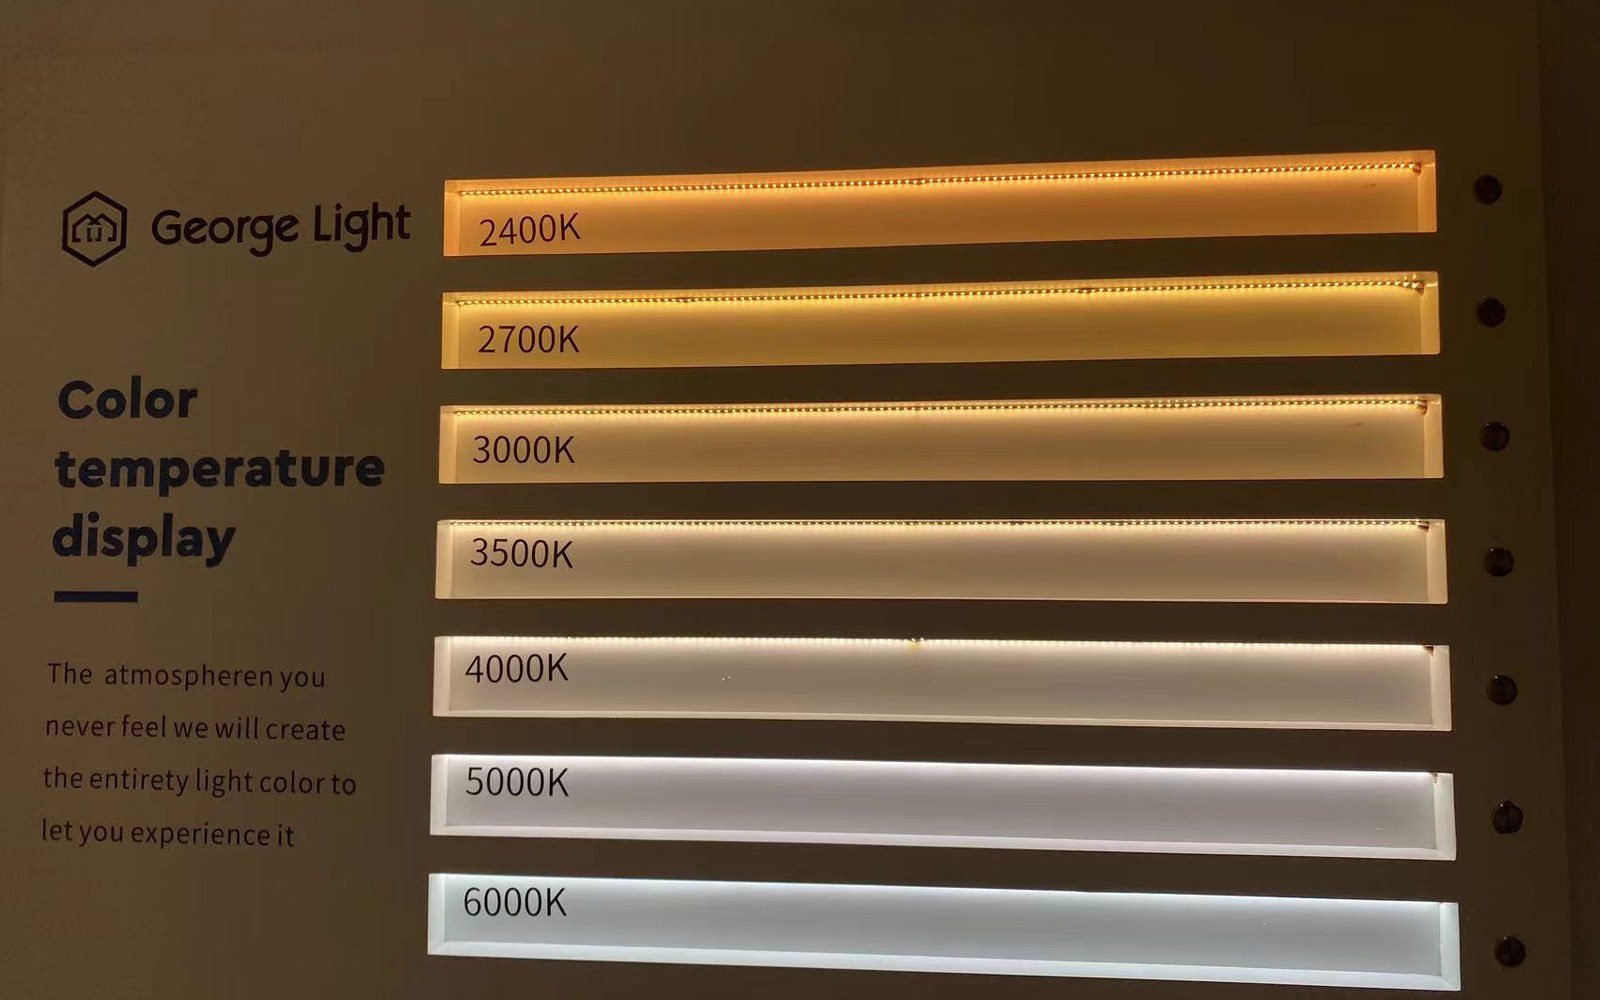
Colour temperature is measured in kelvin, and it is the single specification with the largest effect on how a space feels, because it changes how every material in the room is read (HitLights, updated September 2026).
– 2700K to 3000K reads warm and amber, close to traditional incandescent light
– 3500K to 4000K reads neutral, balanced between warm and cool
– 5000K to 6500K reads cool and blue-white, close to daylight
Two facts matter more than the labels. First, colour temperature does not change brightness: a 2700K strip and a 5000K strip at the same wattage produce the same lumens, and they simply look completely different (ibid.). Second, the same source is blunt about the most common own goal: mixing colour temperatures in one space is generally a mistake, because two strips at different temperatures show a visible inconsistency where they meet and make the room feel unresolved. If a space genuinely needs warmth at one moment and clarity at another, the answer is a tunable white strip that shifts temperature from a controller, not two fixed strips fighting each other (ibid.).
For villa interiors we specify one colour temperature for the whole joinery package, and the practical choice is almost always 3000K. That is not a preference so much as a consensus: 3000K sits in the overlap between warm ambiance and functional task light, which is why professional residential designers default to it where one temperature has to serve several purposes, and it is the common specification for high-end residential kitchens because it stays warm without distorting food colour (ibid.). Bathroom vanities sit in the same zone at 3000K to 3500K for accurate skin tones, while a home office or a study can justify 4000K for clarity (ibid.).
There is one companion number to specify at the same time. CRI, the colour rendering index, decides accuracy, not warmth, and both have to be right: neutral temperature does not compensate for low CRI, and any surface where colour matters, from stone to veneer to fabric, should be specified at CRI 90 or above (ibid.).
Cabinet and closet lighting
Cabinetry lighting is where a villa interior gains most of its perceived quality, and it is also where the cheapest mistakes live.
Under-cabinet strips. The installation rule is specific: place the strip one to two inches back from the front edge of the cabinet underside, so the light spreads across the worktop instead of throwing a shadow towards the splashback. Placed too far back, a strip simply highlights the wall (Toney Kitchens, 2025-10-25). On polished stone, use a diffuser or a continuous strip, because the alternative is a row of visible light dots reflected in the countertop (ibid.).
Inside cabinets and wardrobes. Warm white at 2700K to 3000K adds depth behind glass and makes shelves readable, and door switches or motion sensors keep the light from being a decoration nobody uses (ibid.). Modern LED runs cool, with no meaningful heat build-up inside a cabinet, which matters because a hot strip against a veneer edge is a warranty claim waiting to happen (ibid.).

The parts nobody sees. A cabinet lighting installation is really three components: the strip, the driver or transformer, and the switch. The failure mode we plan against is the inaccessible driver. Drivers belong in a serviceable position, ventilated and reachable without dismantling a cabinet, because a failed driver with no access point turns a five minute job into a carpentry job.
Channels and exit points. Our cabinetry ships with the LED channels, driver positions and cable exits prepared in the workshop, and the factory drawing shows where the cable leaves each cabinet (see the villa interior production process for where that step sits in the build). What the factory cannot do is run the supply wiring inside your wall, which is where the local electrician takes over, exactly as with every other trade on site. The cabinet lighting specification itself is part of the wardrobe package we plan with you (Wardrobes and Walk-In Closets).
Recessed, hood and island: the numbers
The layout numbers are the same in a villa as in an apartment, and getting them right is mostly a matter of refusing to leave them to the electrician’s habit.
Recessed ceiling lights. Position fixtures about 18 to 21 inches from the wall, on centre, so the light falls on the worktop, not on the cabinet fronts, spaced roughly 3 to 4 feet apart depending on ceiling height, with a beam angle of 40 to 60 degrees for broad even illumination (Toney Kitchens, 2025-10-25).
Island pendants. Hang pendants 30 to 36 inches above the countertop, space them 24 to 30 inches apart edge to edge, and use a fixture diameter in the 10 to 18 inch range so the scale suits the island, not fighting it. Dimmable LEDs let the same pendants serve as task light for preparation and as ambient light for evening (ibid.).
Hood lighting. Cooktop zones want 3000K to 4000K for natural clarity, with fixtures rated for heat and humidity (ibid.). Lighting is also the layer that decides whether the cabinetry reads as furniture or as a fitted box, which is why we plan it in the same pass as the kitchen cabinetry.
Toe-kick and over-cabinet layers. Toe-kick strips create the floating effect under base units and work as night navigation, while a strip on top of the upper cabinets washes the ceiling and adds apparent height. Both are usually specified warm, 2700K to 3000K, and both are dimmable (ibid.).
Tall spaces and villa ceilings
A villa has a lighting problem that a flat apartment does not: vertical volume. Double-height halls, stairwells and open living voids read as dark holes at night unless they are given their own layer, and a single large fixture in the middle of the void rarely solves it.
The approach we use is to treat the tall space as its own lighting scene. A pendant cluster at stair level carries the vertical line, and the decorative fixture becomes the accent, not the sole source, which is the arrangement in our own completed projects, and it pairs with concealed washes that lift the ceiling plane instead of pooling light on the floor (Villa Interior Trends 2026).
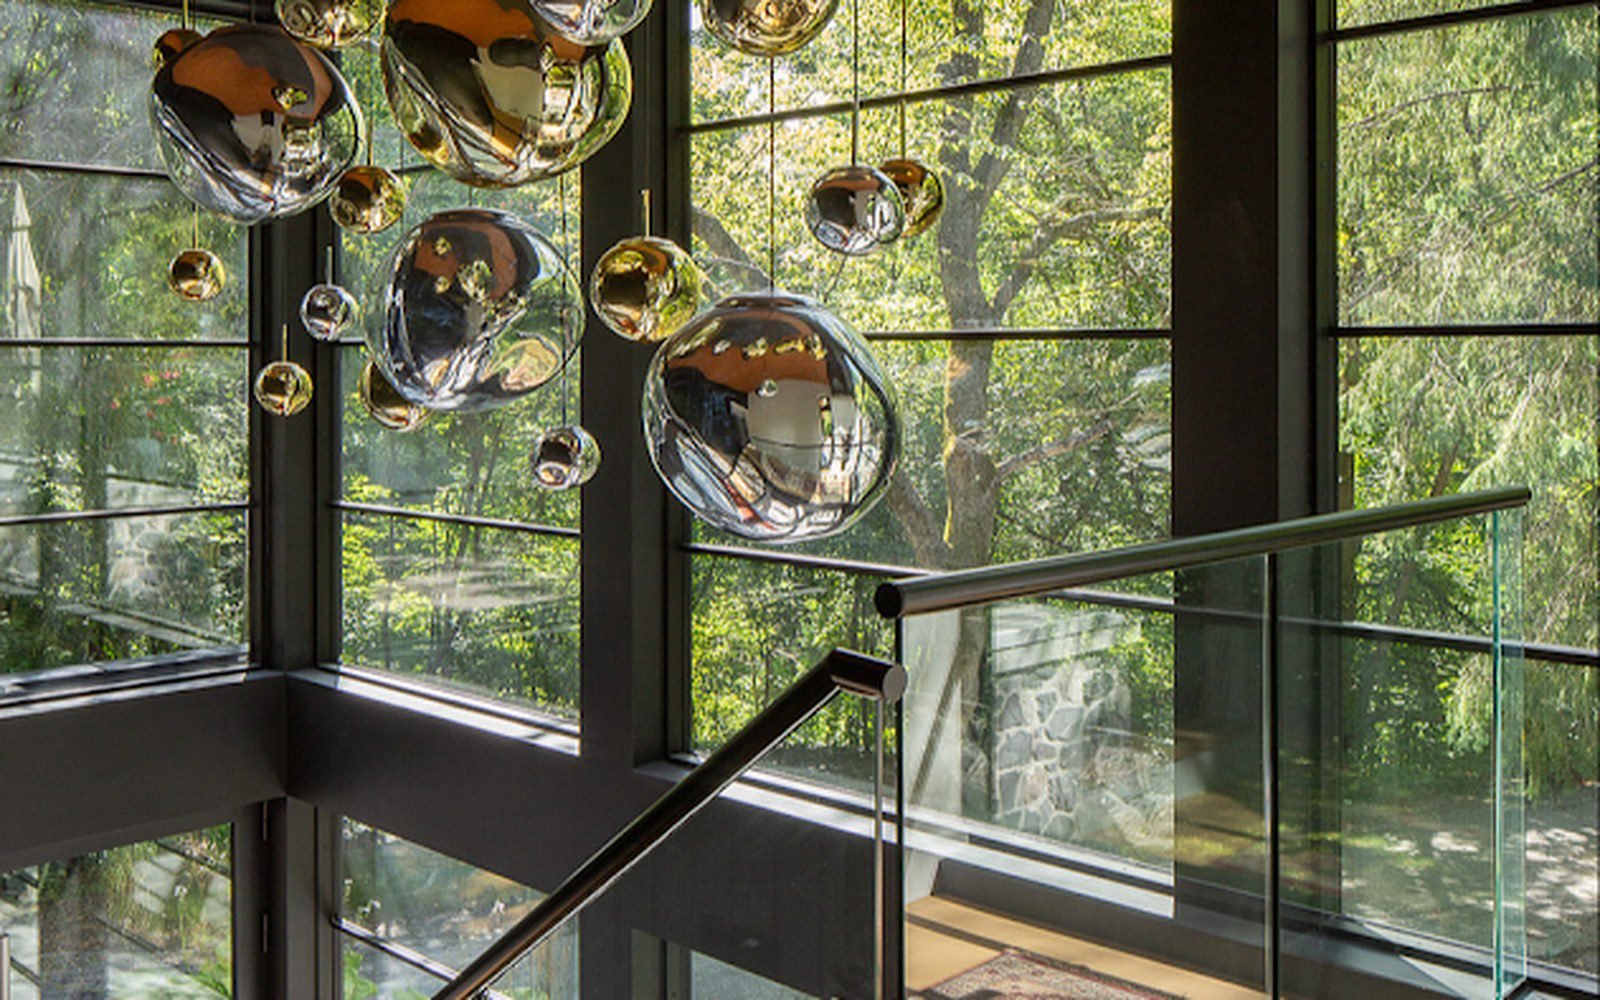
The same logic applies to the outside edge of a villa. Terrace and pool lighting is usually specified as one more uniform grid, when it is really a decorative layer with a task function, and it should be dimmable and warm enough to sit under at night, not floodlighting the garden. We treat those runs as separate zones for the same reason we separate the interior layers.
One detail that is easy to miss in a villa: the same colour temperature discipline applies across floors that are visible from each other. A mezzanine lit at 4000K above a living room lit at 2700K is the same mistake as two strips in one cabinet, only larger (HitLights, September 2026).
The electrical plan: who owns what
Cabinet lighting fails more often on paper than on site, and the document that prevents it is the electrical plan.
The factory owns the joinery side. We specify the channel, prepare the recesses, install the strips where they are factory-fitted, define where each cable exits the cabinet, and draw the internal outlet positions that the lighting will need.
The local team owns the building side. Supply wiring, switch legs, dimmer selection and final connection are done by a qualified local electrician, because they terminate inside your wall and must satisfy your local code (Install Furniture From China: Who Measures, Who Fits).
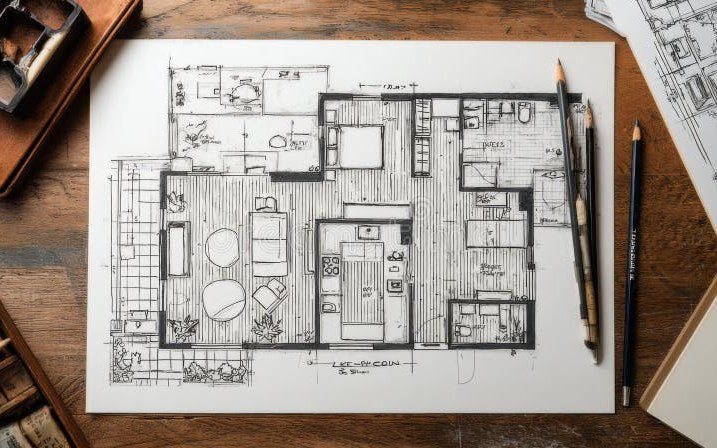
The drawing is the handover point. The cabinet lighting has to appear on the electrical plan before production, with the internal outlet and cable-exit positions marked, in the same way as any other service point. That is the sequence we run from your floor plan to production drawings (From Your Floor Plan to Production Drawings), and it is why cabinet lighting is a drawing-stage decision, not an installation-week improvisation.
One compatibility note worth passing to your electrician: LED strips need LED-compatible dimmers. A dimmer built for halogen will often make an LED run flicker at low settings, and the fix is a component change, not a strip change (Toney Kitchens, 2025-10-25).
A scene list for a villa
The layer plan tells you what to install; the scene list tells you what the switches should do, and it is the document that decides whether a lighting design feels deliberate at eight in the evening.
A workable villa set is five scenes:
– Day. Ambient plus task, no accent. The housekeeping and mid-day setting.
– Cooking. Task layer at full output, hood light on, everything else at a low level.
– Dinner. Ambient dimmed, accent on, decorative pendants or chandeliers at a flattering level. This is the scene guests actually see.
– Night. Toe-kick and wardrobe strips only, at ten percent or less, so a dark house is navigable without switching on a room.
– Cleaning. Every layer to full, because cleaning light is a task layer even if nobody wants to look at it.
Scenes are not a smart-home luxury, they are switch groupings. Each layer gets its own dimmer zone, and the five scenes are combinations of those zones, not five separate wiring systems. The zoning decisions belong on the lighting drawing, before first fix, because a zone that was never drawn is a zone the electrician will not wire.
Sensors deserve their own line in the plan. Wardrobe doors, pantry drawers and toe-kick runs are the three places where an automatic switch earns its cost, and all three are wired as part of the same package, not added afterwards (Toney Kitchens, 2025-10-25).
What we specify in a lighting pack
Buyers often expect the lighting to be a shopping decision made at the end. In a joinery-led villa it is a specification, and it has to exist before production because most of it lives inside the cabinets.
For every project we hand over a lighting schedule covering:
– Colour temperature and CRI. One CCT for the joinery package, normally 3000K, and CRI 90 or above wherever finishes and stone colours matter (HitLights, September 2026).
– Strip and channel type. Continuous diffused runs for visible surfaces and stone worktops, to avoid the reflected dotting that exposes a cheap installation (Toney Kitchens, 2025-10-25).
– Output per run and driver sizing. The lumen target for each cabinet run, translated into the driver capacity, because an undersized driver is the most common cause of a strip that dims itself or flickers.
– Driver location and access. Every driver gets a reachable, ventilated position, marked on the drawing.
– Cable exits and outlet positions. Where each cable leaves the cabinet, and where the electrician must place the outlet inside the cabinet or behind the plinth.
– Switching and sensing. Which layer each switch controls, and where door or motion sensors sit.
– Dimmer compatibility. A written requirement for LED-compatible dimming, because a halogen-era dimmer on an LED run is the flicker complaint we can prevent on paper (ibid.).
At handover, the acceptance test is short: every zone dims smoothly and silently, nothing flickers at low output, no light dots show in polished stone, and every driver is reachable without tools.
Mistakes we see in handover photos
Six problems show up repeatedly in the photographs clients send us after installation.
Only ambient light. A ceiling grid with no task or accent layer is the most common plan by a wide margin, and it cannot be fixed later without opening the ceiling.
Mixed colour temperatures in one room. Warm downlights, a cool strip and a daylight lamp, all visible in the same frame, because each item was bought separately (HitLights, September 2026).
Strips placed too far back. The light lands on the splashback and leaves the worktop in its own shadow (Toney Kitchens, 2025-10-25).
No driver access. The transformer is boxed in behind a fixed panel, and the first driver failure becomes a small demolition.
No dimming. Full brightness is the only setting, so the room has one mood: noon.
Nothing in the tall space. A stairwell or atrium that reads as a dark volume after sunset simply because no one treated it as a room.
Frequently asked questions
What colour temperature should a villa interior use?
One temperature for the whole joinery package, and 3000K is the practical default because it sits between warm ambiance and functional task light and is the standard specification for high-end residential kitchens (HitLights, September 2026). Bedroom and living areas can sit warmer at 2700K, bathroom vanities at 3000K to 3500K, and a study can justify 4000K. What matters most is consistency within sight of each other.
Do I need to buy the lighting from you, or can my electrician supply it?
Either works if the specification is fixed before production. We prepare channels, cable exits and driver positions for the strip specification we are given, so the only hard requirement is that the strip and driver specification is confirmed at the drawing stage, not chosen on site.
Why is my cabinet lighting so expensive to change later?
Because the parts that fail or disappoint are behind the cabinetry: the driver, the cable route and the switch leg. Fixing any of them after handover means removing cabinets, which is why the drawing position and the access panel matter more than the strip itself.
Can cabinet lighting be added to wardrobes after they are installed?
Sometimes, if the wardrobe was built with a channel and a cable exit. Without those, an installer has to cut into finished panels, and the result is visible. It is one of the few specifications worth deciding even when the budget is tight (Walk-In Closet Design Trends 2026; Wardrobes and Walk-In Closets: Soft-Close Hardware and Layout Planning).
How do I avoid the airport runway look?
Fewer fixtures in a layered plan, warm or neutral tones in the 2700K to 3500K range, and dimmers on every layer (Toney Kitchens, 2025-10-25). A ceiling that is evenly bright with no highlight anywhere is not a lighting plan, it is a ceiling.
Does cabinet lighting need ventilation?
Modern LED strips run cool, with no meaningful heat build-up under a cabinet (ibid.), but drivers do generate heat and need air. Our rule is simple: the driver goes where a technician can reach it without tools on the cabinetry.
If you are planning a villa interior and want the lighting layer designed with the joinery, not after it, send us the floor plan and the rooms you care most about, and we will mark up the cabinet lighting positions on the same drawings the factory builds from.